Sunday, June 24, 2012

Mr. T's Student Desk - Spledid Transfer Tut

Mr. T surprised me with this desk that he made while I was at work. He had a moment of divine inspiration. We had talked the night before about building a bed tray that we had seen at one of my favorite blogs, Funky Junk Interiors. He was really proud of himself and I of him. It took a couple of days before I confessed to him that it wasn't high enough to use as a bed tray. It broke his heart :( “Not to worry” said I, “it will make a great student desk!”
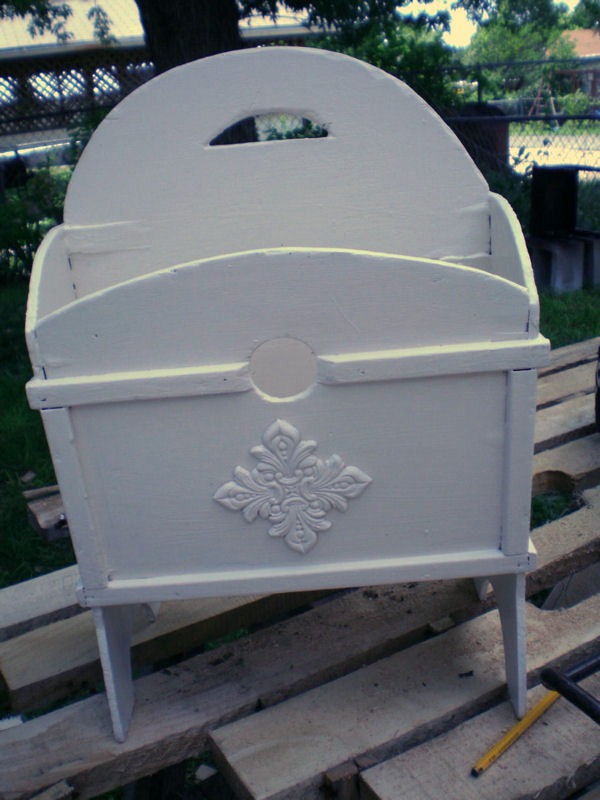
This is how it sat at one of our craft shows. Many interested people but no buyers.

I  had read a tutorial on some pens called Splendid Blenders by Chartpak over at Villabarns blog. (Check out her tutorial on transfering to fabric.)  I just knew they’d be perfect for this project. Rosemary had found the pens at her Michaels; mine had never heard of them. Art Supply Warehouse online sold them for the same $2 each as Michaels so I ordered 4. Glad I did because they are now almost $4 each!

These pens are AMAZING and are Tee-goof-proof! NOTE; THEY ONLY WORK WITH LAZER COPIES. This is how I did my transfers to painted wood. Reverse the print if you’re using text. Here’s what the prints looked like. BTW, you don't have to cut out the image. My vision is poor so I wanted to make sure that I was only going over the intended transfer area and not waste this "magic juice".

Well dang, I didn't get a pic of the other print. Oh well, it's not necessary, you get it, lol.

1. Flip your print over, ink side down.
2. Tape your image in place to keep from smearing
3. Rub your Splendid Blender pen over the back of the image. It doesn't take that much. Life a corner of your image to check transfer.
4. Done - seriously

Here are the awesome results. (pardon my photo skills - I'm working on them)


No need to varnish at all. I didn’t tape my image down my first attempt and it caused a blur. Silly me thought I’d just wash it off. Okay, sand it a liitle. Sand a lot, really? Ugh, sanded a lot then added kiltz followed by paint.

Splendid transfer, personal review. There’s not a lot of liquid in the pens so small projects are reccomended. These two 5″ transfers used the majority of 1 pen. Not bad compared to some transfer techniques. If I can find them at $2 each again, I’ll definitely buy. Not likely to pay the $4 + shipping.

OH, I almost forgot to tell ya’ the best part!! Mr. T’s Student Desk sold for $40. The buyer had seen the desk at our craft show on Saturday; just didn't buy. She came to the shop and was excited that we still had it. Me loves my Mr. T.

PS: I believe that the pen and ink images came from where all great images are found The Graphics Fairy

Thanks for letting me share.
Love yuns,
Tee

Saturday, June 23, 2012

Distressing a Stressful Side Table

This little sweetie was NO quick flip. It had been painted with that old hard as nails speckled black paint and apparently varnished a few times for good measure. I’m just learning about picking the right pieces for quick turnovers and I failed on this one :(
I sanded with my trusty vibrating thingy until I felt like I had Parkinsons.  BTW, isn't this a flattering photo?

A friend was over working on some of her own things. She took a few turns at the vibrating thingy. As you can see in the picture below, she wasn’t impressed. Do you friends have birds growing out of their hands? All mine seem too :)
Here she sits in our mall booth, much purrtier than when she was discovered. I think I paid $3 and she sold about the 3rd day for $29.99. That's the kind of DE-stressing I can handle!

Thanks for letting me share!
Love yuns,
Tee

Friday, June 22, 2012

My Primitive Roots

I fell in love with the Primitive style about 15 years ago. I was in a very close online sharing group. One of the girls directed us to the Prim Mart Community. I didn't play with many dolls as a child but these funky dolls stole my heart. I had to have them! WAIT, I had to learn to sew so I could MAKE them.

Mr. T and I were in line at Wal-Mart within a week, buying my 1st sewing machine. He said to me, "of all the things I never expected to buy you, this is it."  We brought home the new contraption. I took out the manual and was instantly frozen. I had only sewn for a couple of months during High School Homemaker class, I earned an A in cooking and an F in sewing, lol. My biggest dilemma was how to thread the darn thing! Arrows here, arrows there, what??? Mr. T kindly stepped in, figured it out, taught me and I was off and still going. I won't bore you with pics from my 1st efforts but I'll say that it took at least a year before I made anything worthy of selling.

Fast forward 15 years. Through trial and error I finally found my niche and even have a small following of loyal customers. I make and sell white dolls but my niche turned out to be extreme-grungy-black dolls.  Below are my latest babies. I've bought prolly 100 different patterns but I rarely use them, lol. They were great learning tools.


Closer to fall I'll be sharing the other crazy primitives I make for shows. For now I'm focused, okay,  obsessed with Shabby Chic furniture re-dos.

Thanks for letting me share!
Love yuns,
Tee

Another Quick Makeover

Found this cute litte magazine rack at a yard sale. Paid a whole $1. Sanded, painted a few coats then added a cute medallion that I found at Hobby Lobby for $3. It sits pretty in our shop with a price tage of $15.
Check out that gold lame’ briefcase, lol. Had to have it and still don’t know why :)


Thanks for letting me share!
Love yuns,
Tee

Thursday, June 21, 2012

Being Thrifty

Found this 60′s lamp at our local thrift store. It was marked $26.98. A good price for the average person but I ain’t average, I’m cheap.  I talked with the manager about reducing the price. I intended to offer her $15 but she said, “oh, that old thing. Would you give me $12.98?”  Yup, I’ve got a new best friend :)

Here’s the before and after. No big steps involved but I’ll tell you that after lightly sanding and putting on 6 coats of paint, I can reccommend using a primer first, duh!


Here she sits are purrty and white with a modest $35 price tag.
Forgot to mention that the lamp came with a really expensive lamp shade. I traded out a less expensive and more approriate one.

Thanks for letting me share!
Love yuns,
Tee

Tuesday, June 19, 2012

Attempts at Mixed Media Art

Ever wanna try something new but just too scared to try?  Well, that’s me.  I’m a big o Oscar Meyer Weiner with great legs!  I know psycologically that “if at first you don’t succeed, try try again” but the cliche doesn’t often get used in my life.
Insert Christy Tomlinson, mixed media artist extraordinare.  I think I found her on Youtube but I follow her wonderful blog now. Anyway, if you’ve ever wanted to try mixed media, this is your go-to gal. She talks alot and is very funny, messy and talented. Best of all she's done many videos that  make everything look so easy that it will give you the boost you need to jump in.  I finally did and I’m proud to say that I’m less Oscar Meyer :)  Below you’ll see my first attempts. I followed Christy a bit too closely but I’m now confident that I can use her techniques and find my own niche.

I branched out a little from the canvas to these other projects.


Thanks for letting me share!
Love yuns,
Tee

Hats On - Hats Off

This style hat seems to be all the rage around here. I call them Fidel Casto style :) Decorating them isn’t something that came natural to me but at a great customers request, I gave it a go. She bought all except the pink;  her sister bought it. Even though I made a little money, not sure I’ll do them again.  I'm doing this post because when I went online searching for inspiration, I couldn't find ANYthing like them.


BTW, aren’t these mannequin heads awesome? There are two local spinster sisters that make them. They start with a regular strofoam head. They add their “secret sauce” to give them this porcelan finish. They are stunning in person.

Thanks for letting me share!
Love yuns,
Tee

Another Funky Junk Interior Inspiration

Is this not the cutest most rustic idea??


After yet another Saturday Night Special post over at the Funky Junk Interior blog, I knew I had to make one  many of these.  Rustic is my passion and this gal gets me pure giddy!

I bought this vintage, no legged washboard at a junk sale. My GF just rolled her eyes, lol. Sometimes you just gotta’ have it, right?

Mr. T helped me build a wonderful box around it. We used some of the wonderful FREE pallet wood that he got from work. He was actually quite proud so we decided to do some inspiration/promo shots.


Since this project was done,  I scored some really rusty license plates. I’ll be havin’ more “funky junk” fun.
Thanks for letting me share.
Love yuns,
Tee

I'm Ecomonically Challenged....

...and just plain cheap :)  I love me some re-purposed and free materials just make me giddy. I have found no better blog for that combination than Funky Junk Interiors.  This gal gets me giddy with all the possibilities out there. Because of her, I’ve learned to use a few power tools. Mr. T hasn’t let me use the sharp ones yet.
Here’s a wonderful barn door from the Funky Junk Interior blog that we made and sold within a half hour of revealing it.  You MUST visit the blog! She gives wonderful instructions!

This is Mr. T using the sharp thing that makes saw dust fly.
And me working that vibrating thing that makes wonderful holes for screws to go in.
Following Funky Junk’s wonderful instructions, we had this bad boy made within 1/2 hour. Took longer to paint than make!

The end result was awesome.

This was our Funky Junk Interior Inspiration


Thanks for letting me share!
Love yuns,
Tee

Waterslide Decal project via The Polka Dot Closet

I'm very lucky to be cyber-pals with the talented Ms. Carol over at the Polka Dot Closet.  She has inspired this rusty old bucket to explore and try her hand at Shabby Chic. Carol is extremely generous with her tutorials!  Below I'm going to show you what I did with Waterslides. I've never done a tutorial before so it's best to learn from the best. Go see Carol's tutorial here The Polka Dot Closet

1. Select the piece you want to decorate. Purchase and print your waterslide decals. Carol sells Waterslides from her store; link on top left of her blog.
This is the piece I chose.
I painted it white then distressed the edges with brown shoe polish.

2. Cut out your waterslide design. You don’t have to cut really close because the background is transparent. Soak your design in warm water for 15-20 seconds.  You’ll feel the design separating from the back paper.


3. I believe that Carol suggests that you take the design from water to a paper towel but it worked better for me to go from water to piece. The water allows you some play time. Once the piece is in place, dab off the excess water and smooth the decal with a credit card to remove any bubbles.


4. Voila, you're done! Amazingly simple and FAST. Even I can do it :)
Here’s the piece sitting in my Antique Mall Booth.

Tnanks for letting me share!
Love yuns,
Tee

Sunday, June 17, 2012

Craft Show Goodness

The only way I can justify all the crafting that I do is to do a few craft shows a year, plus a local market booth and sell via my girlfriend’s Antique Store. My local show partner and other BF have been doing shows together for the past 8 years. We only do the local shows that we’ve tested and KNOW are good ones. I was blessed to have met my partner, Marykay. She has an awesome Antique store and has a fabulous gift of display. Each show has a combination of handmade goods and antiques. It’s a beautiful blend and we always get many compliments on our set-ups. I thought I’d share a few of our shows with you.
This is a Fall/Winter show we did held at the George Washington Carver Elementary. It was the 1st year that they hosted a show and it’s was VERY successful. We’ll be going again this year.


Prior to any show, Marykay does pre-set ups inside her store. She is Type 1 Bi-Polar and this is a must for her sanity. We print and take the pictures so that our set up time is lessened. Does anyone else do this??? Our set up time varies between 8-10 hours. Marykay can get ALOT of product into a small space. Here’s a few examples.
Our potion filled bottles always sell the best.
Neutrals and White on White is my fav! What colors, set-ups or products do ya’ll scurry to when you go to a show?  We’d love to know!

Thanks for letting me share just an itsy bit of our lives with you.
Love yuns, Tee